Adjusting S (saturation)
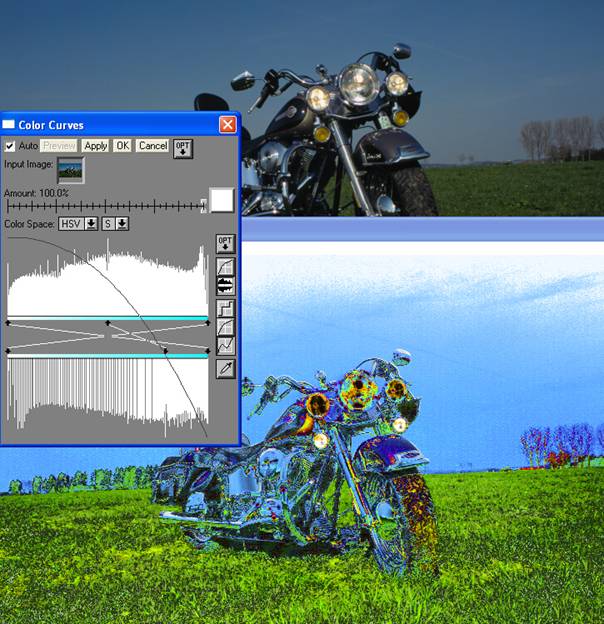
In general adjust saturation after adjusting V, using the image with the V adjustments already applied. This is carried out seamlessly in PWP by switching from the V channel to the S channel. You can, of course flip between the two tweaking each in a complimentary fashion. A good starting point is to increase the minimum saturation to 50 – i.e. the saturation ranges from 50-100. This is easily done by moving the bottom of the left control arrow. This image needed more to bring out the colours in the bike properly. Note the colours that were barely visible tints after the V changes.
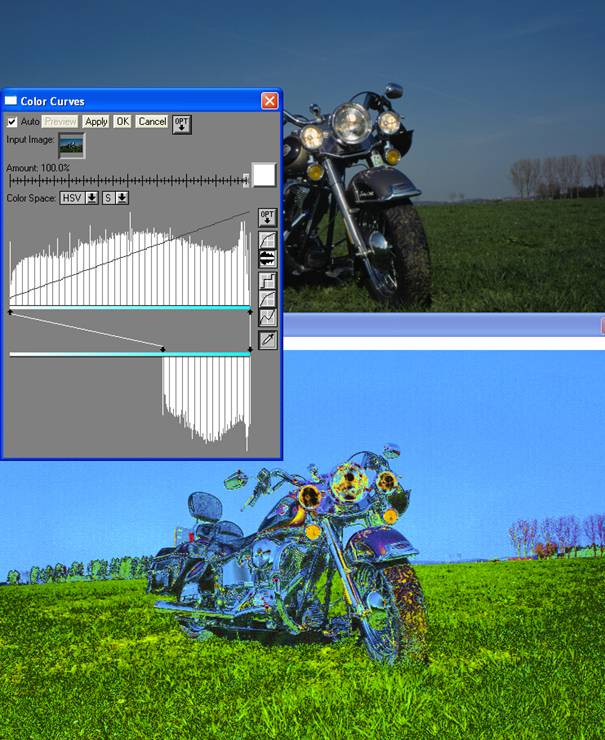
You can, of course invert the saturation channel, or carry out complex manipulations/inversions on it. One problem with this particular image is that after increasing the saturation the sky is rather uninteresting and tends to dominate the result, rather than emphasising the bike, it’s relegating it to the background. A saturation inversion (using the same V changes as in the previous colour images) produced a more interesting result.
In an inversion like this is the mid tones retain a similar saturation to the unmodified image, while highly saturated areas lose their colour and areas with little colour develop them. It is also worth experimenting with complex saturation adjustments, an example is given later after the H channel adjustments have been discussed.
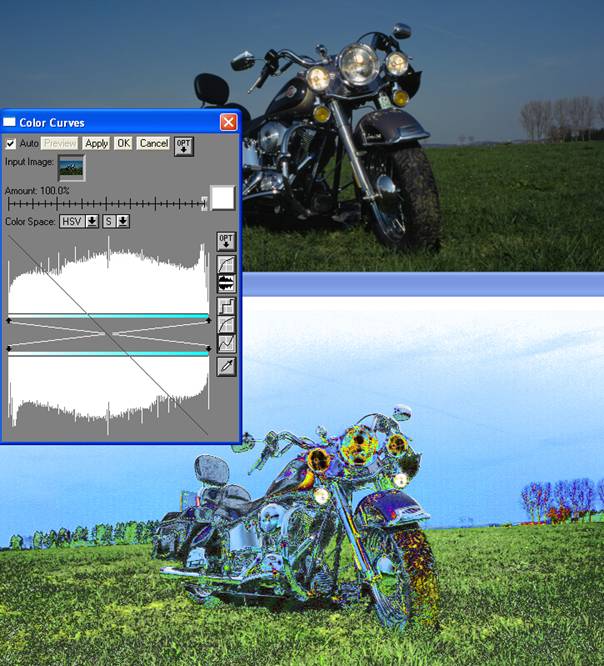
Anchors can also be used to good effect as seen in the following version of the image. The anchor serves to increase saturation in mid and higher tones, while still allowing the highest areas of saturation to move close to zero.